Lawn Edging Techniques: Creating Clean, Defined Lawn Borders
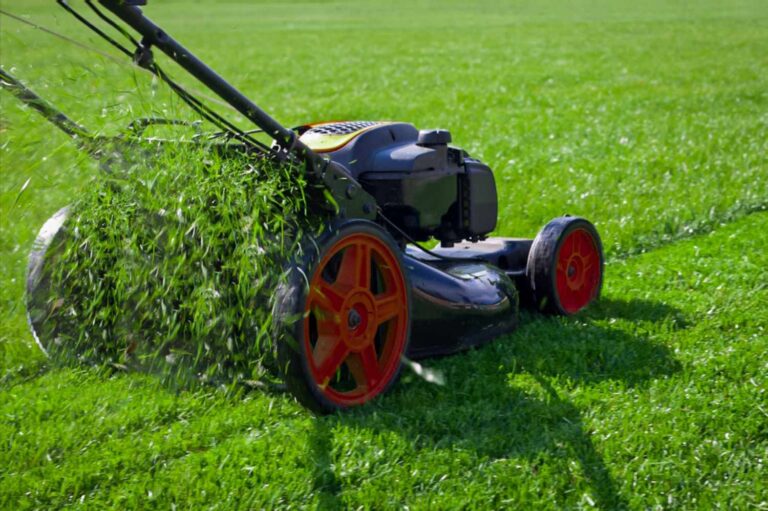
You know that frustrating moment when you’ve just finished mowing your lawn, and it looks decent from a distance, but up close? The edges are a complete mess. Grass is creeping into your flower beds, your walkways look like they’re being swallowed by green chaos, and no matter how perfectly you cut the main lawn area, those raggedy borders make the whole yard look unprofessional. We’ve seen this exact scenario play out in countless yards across our service area – homeowners spending hours on lawn care only to have their hard work undermined by sloppy, undefined edges.
Here’s the thing though – achieving those crisp, professional-looking borders isn’t some mysterious art form that only Lawn Care Services can master. With the right techniques, proper tools, and a solid understanding of edge maintenance, you can transform your property’s appearance dramatically. We’ve been perfecting these edging methods for years, and trust us, once you nail down the fundamentals, your neighbors will be asking for your secrets. The difference between an amateur-looking lawn and a professionally maintained one often comes down to just a few key edging principles that we’re about to share with you.
Why Professional Edging Makes All the Difference
Let’s be real – most people think edging is just about aesthetics, but it’s actually way more important than that. Proper lawn edging serves as a barrier system that prevents grass from spreading where it shouldn’t, protects your garden investments, and actually reduces your long-term maintenance workload. When we work on commercial properties, the first thing property managers notice isn’t the mowing pattern – it’s whether the edges look intentional and well-maintained.
Think about it this way: your lawn is basically a living thing that wants to expand and take over everything in its path. Without defined borders, you’re fighting a losing battle against nature every single weekend. We’ve seen lawns completely overtake expensive landscaping features simply because the homeowner didn’t establish proper edge control from the start.
Essential Tools for Professional-Grade Edging
1. Manual Edging Tools
Manual edging tools give you surgical precision and complete control over your border creation. We still reach for these on delicate jobs where power tools might be overkill:
The beauty of manual tools is that they’re quiet, give you complete control, and won’t accidentally scalp your grass if you get a little too enthusiastic. Plus, there’s something satisfying about the clean “thunk” of a sharp edger cutting through turf.
2. Power Edging Equipment
Now, if you’re dealing with larger areas or tougher conditions, power edging tools will save your back and dramatically speed up the process. Here’s what we recommend based on different scenarios:
String trimmer techniques deserve special mention here because most homeowners already own one, and with the right approach, you can achieve professional results without buying additional equipment.
Different Edge Types and Applications
1. Shallow Decorative Edges
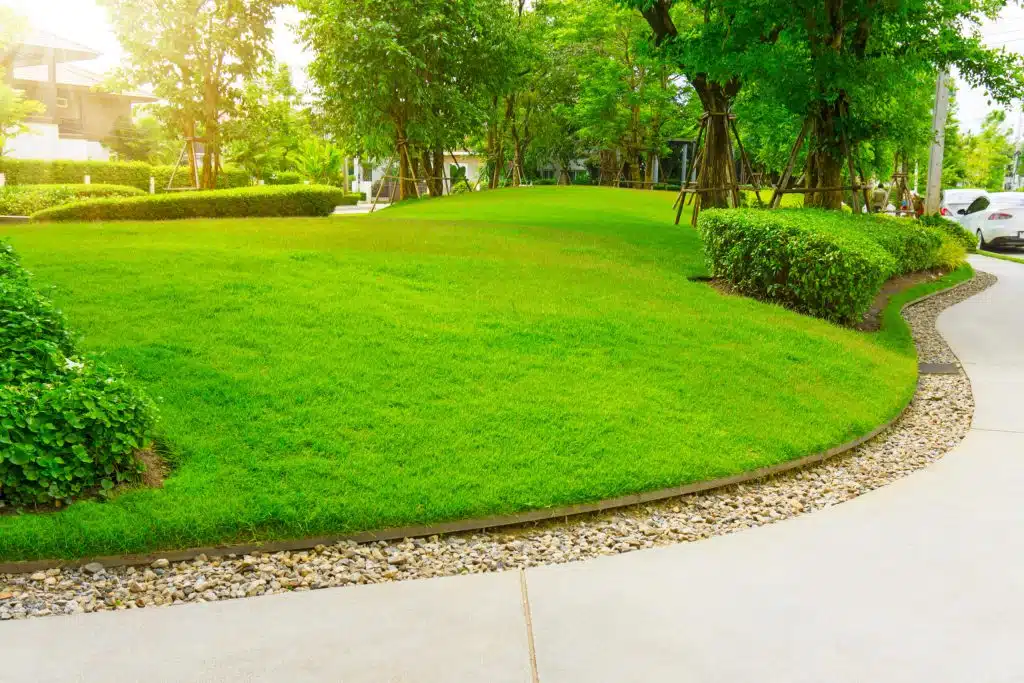
These are your basic borders that primarily serve aesthetic purposes. Shallow edges work great around flower beds, tree rings, and areas where you want definition without creating a major barrier. We typically cut these about 2-3 inches deep, just enough to create a clean visual line and prevent immediate grass encroachment.
The key with decorative edges is consistency – they need to follow smooth, natural curves that complement your landscape design. We’ve learned that trying to force straight lines where they don’t belong often creates more problems than it solves.
2. Deep Structural Edges
For areas where you need serious grass control, deep structural edges are the way to go. These typically run 4-6 inches deep and create a genuine barrier that grass roots can’t easily cross. We use these around driveways, walkways, and anywhere grass encroachment would create ongoing maintenance headaches.
Creating edges that last requires understanding soil conditions and grass types in your specific area. Some grasses are more aggressive spreaders than others, and your edging strategy needs to account for that reality.
3. Transition Edges
These are the subtle borders that separate different areas of your landscape without creating harsh lines. Transition edges work beautifully between lawn areas and groundcover, or where your property meets natural areas. They require a lighter touch but can make your entire landscape feel more cohesive and intentional.
Planning Your Edging Strategy
Assessing Your Property’s Needs
Before you pick up any tools, take a walk around your property and really look at what you’re working with. Different situations call for different approaches, and we’ve learned that trying to use the same technique everywhere usually leads to frustration.
Look for areas where grass is already causing problems – these are your priority zones. Pay attention to water flow patterns, because edges that fight natural drainage never last long. Also consider your maintenance capacity – there’s no point creating elaborate borders if you won’t have time to maintain them properly.
Seasonal Timing Considerations
Timing your edging work can make the difference between success and having to redo everything in a few months. Spring is generally ideal because grass is actively growing and will recover quickly from any minor damage. Fall edging gives you a head start on the next growing season and takes advantage of cooler working conditions.
We avoid major edging work during peak summer stress periods unless absolutely necessary. Stressed grass doesn’t recover well from aggressive cutting, and you’re more likely to create permanent damage that affects your lawn’s overall health.
Step-by-Step Professional Edging Process
1. Preparation and Layout
Start by clearly marking your intended edge lines – we use spray paint or flour for temporary marking that won’t harm your grass. Proper preparation saves you from having to correct mistakes later, and trust us, re-doing edges is nobody’s favorite job.
Clear the area of debris, rocks, and any obstacles that might interfere with your tools. If you’re working around trees and garden beds, take extra time to plan your approach since these areas often require special techniques.
2. Cutting Techniques for Different Conditions
Manual vs power edging really comes down to matching your tool to the specific conditions you’re facing. For established grass lines, we start with a sharp spade to cut through the root system, then follow up with appropriate tools for the depth and finish we want.
The key is maintaining consistent depth and angle throughout your cut. We typically aim for a slight inward slope that helps contain grass roots while creating a clean visual line. Avoid the temptation to rush – smooth, deliberate cuts always look better than hurried hack jobs.
3. Finishing and Cleanup
Once you’ve made your cuts, proper cleanup is crucial for achieving that professional appearance. Remove all cut grass and debris from the edge area – leaving clippings behind creates a messy look and can actually encourage new grass growth in areas you just cleared.
Edge management doesn’t end when you put your tools away. Plan to revisit your new edges within 2-3 weeks to address any areas that need touch-ups before they become bigger problems.
Maintaining Your Professional Edges
Regular Maintenance Schedule
Long-term edge management requires consistent attention, but it doesn’t have to be overwhelming. We recommend quick edge touch-ups every 2-3 weeks during peak growing season, with more thorough maintenance 2-3 times per year.
The investment in regular maintenance pays huge dividends in reduced workload over time. Preventing grass encroachment is always easier than trying to reclaim lost ground after grass has established itself in unwanted areas.
Troubleshooting Common Problems
Even with perfect technique, you’ll occasionally run into challenges. Grass breakthrough usually indicates your initial cut wasn’t deep enough or your maintenance intervals are too long. Edge erosion often points to drainage issues that need addressing beyond just the edging work itself.
Detail work around complex areas like sprinkler heads or utility markers requires patience and the right tools. We’ve found that taking extra time on these tricky spots prevents bigger headaches down the road.
Your lawn’s edges are literally the frame around your landscape masterpiece – they deserve the same attention you give to the main lawn area. With these professional techniques and a commitment to regular maintenance, you’ll create borders that not only look amazing but actually make your overall lawn care routine easier and more effective.